


Performance, performance, performance! That’s the whole point of caching.Caching specifically helps speed up an application’s performance, thereby significantly improving its efficiency.
This article will look at how to add caching functionality to a NestJS app with Redis. We’ll talk about what caching is, about Redis, and go over the implementation process.
So grab a cup of coffee (or whatever it is you all drink these days). This is going to be an interesting one!
What is caching?
In computing, a cache is a frequently queried, temporary store of duplicate data. The data is kept in an easily accessed location to reduce latency.
Let me form an analogy to help explain this concept better…
Let’s say you did get that cup of coffee after all! Imagine that each time you drink a bit of it, you have to head back to your coffee machine. You fill up your cup, take a sip, and leave it there to head back to your workstation and continue reading this article.
Because you have to keep going back and forth to your coffee machine and cup, it takes you several hours to finish your coffee (and this article). This is what happens without caching.
Let’s imagine a different scenario. Let’s say when you head over to your coffee machine for your first sip of coffee, instead of taking a sip and heading back to your workspace, you fill up your cup and head back to your workstation with it in hand.
As you continue reading this article, you always have your coffee at your desk. You can quickly take a sip (lower latency) so you can concentrate on this article and finish it much faster. This is what happens when caching is implemented.
If we are to bring this analogy to the real world, the coffee machine is the web server and the coffee itself is the data that’s frequently queried.
What is Redis?
According to the official Redis website, “Redis is an open source, in-memory data structure store used as a database, cache, message broker, and streaming engine.”
It’s important to note that Redis doesn’t handle caching alone. It provides data structures like hashes, sets, strings, lists, bitmaps, and sorted sets with range queries, streams, HyperLogLogs, and geospatial indexes.
Implementing Redis cache in a NestJS App
Prerequisites
To follow along with this article, you’ll need the following:
Node.js installed on your computer
Basic knowledge of JavaScript and Node.js
NestJS Command Line Interface (CLI) installed on your computer
Basic understanding of how Nest works
If you don’t have NestJS installed, this will help you get up to speed.
After you’ve installed the NestJS CLI on your machine, let’s go ahead and set up the Redis cache for our application.
Setting up Redis cache for our NestJS app
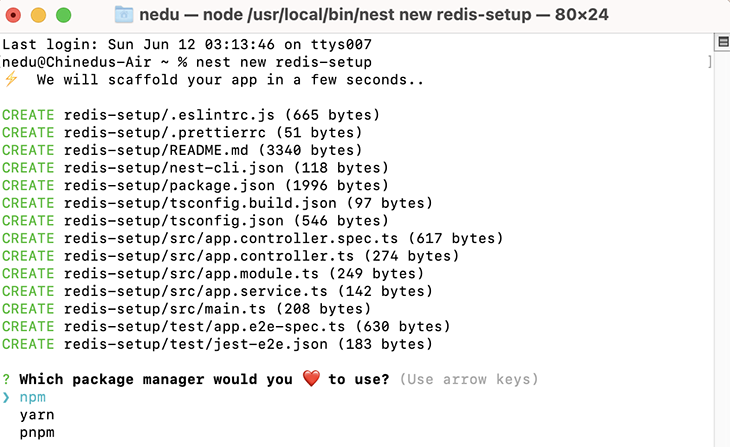
First, let’s create a new project. We’ll call it redis-setup. Open the terminal after installing NestJS and run the below line of code:
nest new redis-setup
After that, we want to select our preferred package manager.
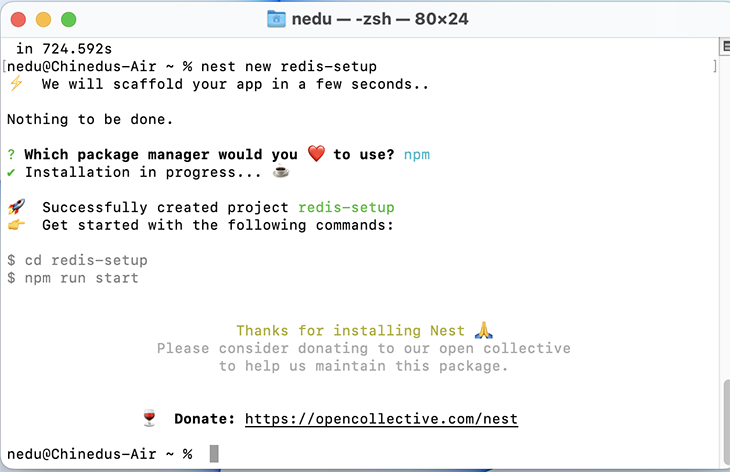
In my case, I chose npm but please pick whichever works for you! After that, the installation will continue.
Once the installation is done, we’ll see something similar to the below screenshot. We have to cd into our app by running cd redis-setup.
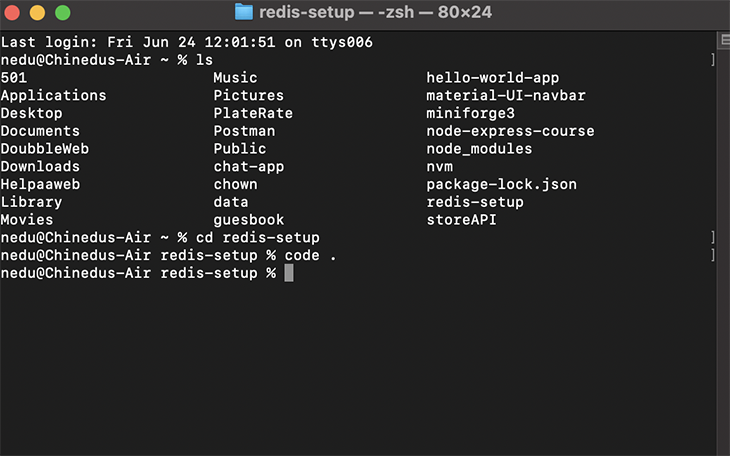
Once inside the project directory, we’ll run code in the terminal. This will automatically open the project in VS Code, provided that it’s installed.
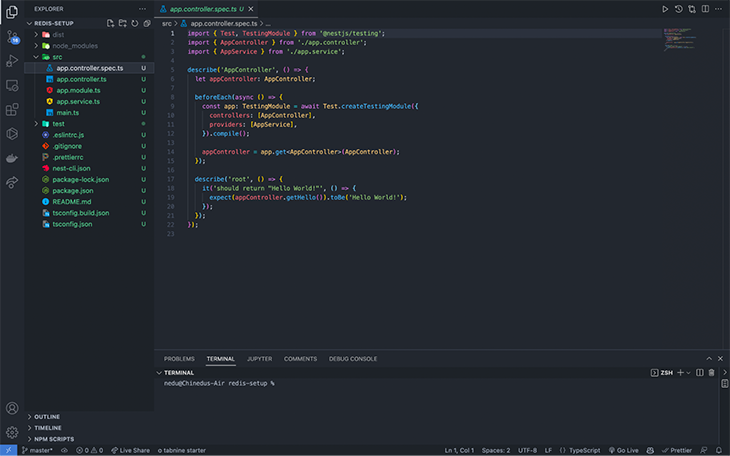
Below is what our redis-setup project looks like.
Before we continue our setup, there are four main packages we need to install in our application.
Installing packages
The first package we need to install is node-cache-manager. The Node cache module manager allows for easy wrapping of functions in cache, tiered caches, and a consistent interface. Install this by running npm install cache-manager in the terminal.
Next, we need to install @types/cache-manager, the TypeScript implementation of node-cache-manager. Install this by running npm i @types/cache-manager in the terminal.
Third, we’ll install cache-manager-redis-store. This package provides a very easy wrapper for passing configuration to the node_redis package. Install this by running npm install cache-manager-redis-store --save in the terminal
Finally, we need to install @types/cache-manager-redis-store. This is the TypeScript implementation of the cache-manager-redis-store package. Install this by running npm i --save-dev @types/cache-manager-redis-store in the terminal.
After we are done with the installation, we can proceed to configure redis-cache for our app.
Configuring redis-cache
The first step to configuring redis-cache is importing the CacheModule and calling its method register(). This method will take our Redis configurations.
//import CacheModule from @nestjs/common'

import { Module, CacheModule } from '@nestjs/common';
In our register(), which takes an object, we will create a property called store and assign redisStore to it. The redisStore will represent the cache-manager-redis-store library that we installed.
//import CacheModule from '@neskjs/common/cache';
import { Module, CacheModule } from '@nestjs/common';

//import redisStore from 'cache-manager-redis-store';
import * as redisStore from 'cache-manager-redis-store';

import { AppController } from './app.controller';
import { AppService } from './app.service';

@Module({
  imports: [CacheModule.register({ store: redisStore })],
  controllers: [AppController],
  providers: [AppService],
})
export class AppModule {}
Next, we’ll set up another property in the register() method object. We’ll add another property called host and set its value to the default localhost. We’ll set the port to the default value of 6379.
//import CacheModule from '@neskjs/common/cache';
import { Module, CacheModule } from '@nestjs/common';

//import redisStore from 'cache-manager-redis-store';
import * as redisStore from 'cache-manager-redis-store';

import { AppController } from './app.controller';
import { AppService } from './app.service';

@Module({
  imports: [CacheModule.register({
    store: redisStore,
    host: 'localhost', //default host
    port: 6379 //default port
  })],
  controllers: [AppController],
  providers: [AppService],
})
export class AppModule {}
With the above, we’ve set up a simple, basic configuration between Redis and our NestJS application!
The second step is to inject the functionality into our controller. This is so our controllers can communicate with the Redis store. We need to inject CacheManager.
In our project directory, head over to app.controller.ts. In this file, we’ll import Get, Inject, and CACHE_MANAGER from @nestjs/common.
//importing Get, Inject, Inject, and CACHE_MANAGER from nestjs/common
import { Controller, Get, Inject, CACHE_MODULE } from '@nestjs/common';
After that, we’ll pass in Inject and the CACHE_MANAGER token. Next, we’ll import Cache from cache-manager and pass it to our cacheManager.
//importing Get, Inject, Inject, and CACHE_MANAGER from nestjs/common
import { Controller, Get, Inject, CACHE_MANAGER } from '@nestjs/common';
//import the cache manager
import Cache from 'cache-manager';
import { AppService } from './app.service';

@Controller()
export class AppController {
  constructor(@Inject(CACHE_MANAGER) private cacheManager: Cache{}

  @Get()
  getHello(): string {
    return this.appService.getHello();
  }
}
N.B., The Cache class is imported from the cache-manager library, while the CACHE_MANAGER token is imported from @nestjs/common.
The CACHE_MANAGER injects the redis-cache-store, while Cache provides the default method for Cache communication and also works with any other store.
Let’s understand the get and set methods of the Redis store.
get and set methods
The Cache instance has the get method, which we have from the cache-manager package. This method enables us to get items from the cache. null is returned if the cache is empty.
let val = await this.cacheManager.get('key');
We use the get method for adding an item to the cache. The default caching time is five seconds, but we can manually set the time to live (TTL) to anytime we need. It will depend on the app’s specs.
await this.cacheManager.set('key', 'value', {ttl: 2000});
In our get method, we’ll pass the URL for checking our Redis store.
@Get('get-number-cache')
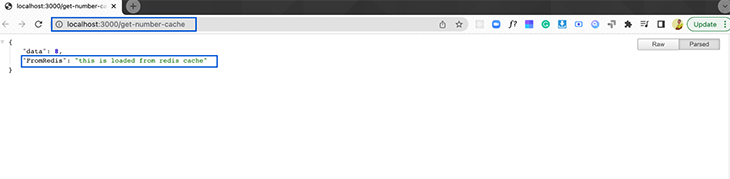
Next, in our app.controller.ts, we’ll create a method that gets a number. We’ll check if our number is available in the Redis store using the string number.
const val = await this.cacheManager.get('number')
    if(val) {
      return {
        data: val,
        FromRedis: 'this is loaded from redis cache'
      }
    }
If this is the case, we will return the data to our endpoint. But, if the data does not exist in redis-store, we store it using the key number and set the TTL to any desired value. In our case, we’ll use 1000.
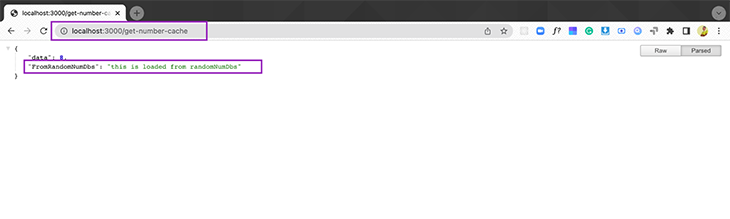
Finally, we’ll return the stored data from our dummy database randomNumDbs. In this case, we are generating the number randomly. We could use a string, but in a real-world production application, this is where we’d get the data from the database for every first request.
if(!val){
      await this.cacheManager.set('number', this.randomNumDbs , { ttl: 1000 })
      return {
        data: this.randomNumDbs,
        FromRandomNumDbs: 'this is loaded from randomNumDbs'
    }
Below is the complete code:
@Controller()
export class AppController {
  //This would be our dummy database since we won't be connecting to a database in the article
  randomNumDbs = Math.floor(Math.random() * 10)
  constructor(@Inject(CACHE_MANAGER) private cacheManager: Cache) {}

  @Get('get-number-cache')
  async getNumber(): Promise<any> {
    const val = await this.cacheManager.get('number')
    if(val) {
      return {
        data: val,
        FromRedis: 'this is loaded from redis cache'
      }
    }

    if(!val){
      await this.cacheManager.set('number', this.randomNumDbs , { ttl: 1000 })
      return {
        data: this.randomNumDbs,
        FromRandomNumDbs: 'this is loaded from randomNumDbs'
    }
  }
}
Now it’s time to run our application and test what we have done thus far. To do this in the terminal, run npm start and visit the URL http://localhost:3000/get-number-cache in the browser.
On our first load, our request will be taken from our dummy, random number database.
The second request (and others) will load from the Redis store until the cached data expires.
Redis cache also has two other methods: del and reset.
del and reset methods
If it’s not already self-explanatory, the del method helps us remove an item from the cache.
await this.cacheManager.del('number');
The reset method, on the other hand, clears the entire Redis store cache
await this.cacheManager.reset();
Setting up automatic caching using Interceptor
Auto cache enables cache for every Get action method inside of the controller using the CacheInterceptor.
In our app.module.ts file, we will import CacheInterceptor. Configure the expiration globally for our auto cache, using the TTL property. To enable CacheInterceptor, we need to import it into the array providers.
//import CacheModule from '@neskjs/common/cache';
import { Module, CacheModule, CacheInterceptor } from '@nestjs/common';

//import redisStore from 'cache-manager-redis-store';
import * as redisStore from 'cache-manager-redis-store';

import { AppController } from './app.controller';
import { AppService } from './app.service';
import { APP_INTERCEPTOR } from '@nestjs/core';

@Module({
  imports: [CacheModule.register({
    store: redisStore,
    host: 'localhost', //default host
    port: 6379, //default port
    ttl: 2000, //ttl
  })],
  controllers: [AppController],
  providers: [
    {
      provide:APP_INTERCEPTOR,
      useClass: CacheInterceptor
    },
    AppService],
})
export class AppModule {}
Next, in app.controller.ts, we import the UseInterceptor and CacheInterceptor from @nestjs/common.
import { Controller, Get, Inject, CACHE_MANAGER, UseInterceptors, CacheInterceptor } from '@nestjs/common';
We use the UseInterceptors decorator directly under our @controller() and pass CacheInterceptor to it. This will enable auto caching for all our Get endpoints inside the controller.
//importing Get, Inject, Inject, and CACHE_MANAGER from nestjs/common
import {Controller, Get, Inject, CACHE_MANAGER, UseInterceptors, CacheInterceptor} from '@nestjs/common';
//import the cache manager
import {Cache} from 'cache-manager';
import { AppService } from './app.service';
//import Profile.ts
import {User} from './shared/model/User';
@UseInterceptors(CacheInterceptor)
@Controller()
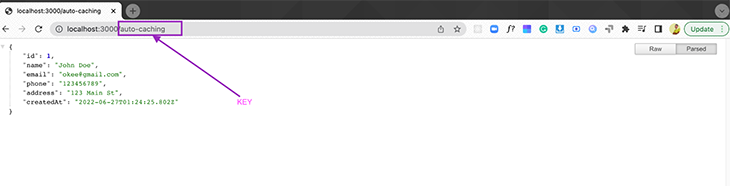
export class AppController {
fakeModel:User = {
id: 1,
name: 'John Doe',
email: 'okee@gmail.com',
phone: '123456789',
address: '123 Main St',
createdAt: new Date(),
}
@Get('auto-caching')
getAutoCaching() {
return this.fakeModel;
}
}
For auto caching, the key is the route value. This is what is going to be stored in our cache, shown in the screenshot below.
We can confirm this in our CLI by inputting the keys * command.
In cases where we want to store data for a specific route, we won’t use the globally defined time and key. We can customize our method to have a different time.
In app.controller.ts, we use a decorator called @CacheTTL(). For the unique key, we use another decorator @CacheKey(), imported from @nestjs/common.
//importing Get, Inject, Inject, and CACHE_MANAGER from nestjs/common
import {Controller, Get, Inject, CACHE_MANAGER, UseInterceptors, CacheInterceptor, CacheKey, CacheTTL} from '@nestjs/common';
Specify a string that will save the data into the Redis store and a private time for our controller.
@Get('auto-caching')
  @CacheKey('auto-caching-fake-model')
  @CacheTTL(10)
  getAutoCaching() {
    return this.fakeModel;
  }
The complete code for the app.controller.ts file auto caching code is below.
//importing Get, Inject, Inject, and CACHE_MANAGER from nestjs/common
import {Controller, Get, Inject, CACHE_MANAGER, UseInterceptors, CacheInterceptor, CacheKey, CacheTTL} from '@nestjs/common';
//import the cache manager
import {Cache} from 'cache-manager';
import { AppService } from './app.service';
//import Profile.ts
import {User} from './shared/model/User';

@UseInterceptors(CacheInterceptor)
@Controller()
export class AppController {
  fakeModel:User = {
    id: 1,
    name: 'John Doeeee',
    email: 'okee@gmail.com',
    phone: '123456789',
    address: '123 Main St',
    createdAt: new Date(),
  }

  @Get('auto-caching')
  @CacheKey('auto-caching-fake-model')
  @CacheTTL(10)
  getAutoCaching() {
    return this.fakeModel;
  }
}
Conclusion
That’s it! In this article, we went over how to add a Redis cache to a NestJS application.
Redis enables lower application latency and very high data access. This has allowed software engineers to build highly performant, reliable solutions.
In my opinion, the advantages of Redis outweigh the disadvantages (if there are any). I hope I have shared some in-depth information on how NestJS and the Redis store work!
If you loved this article, please comment in the comment section! Thanks for staying with me until the end of this one. Bye!!!